- Get link
- X
- Other Apps
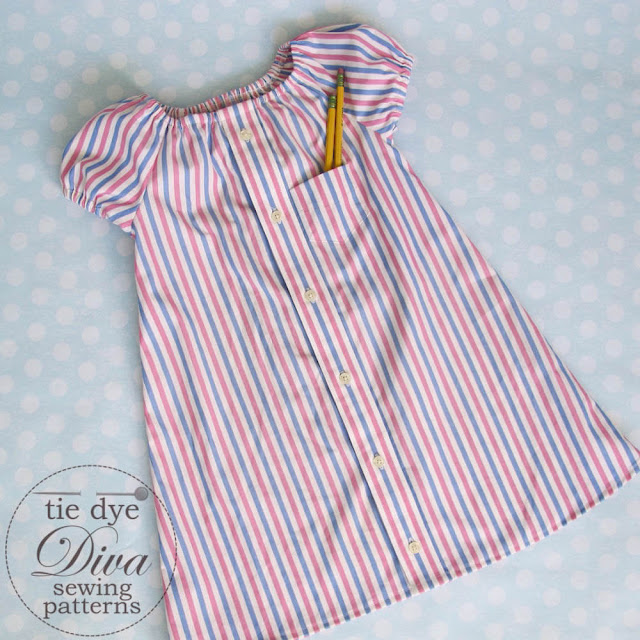
It’s so easy to upcycle a man’s dress shirt into a peasant dress! Here’s how.
You’ll need:
Man’s dress shirt.
Peasant dress pattern like Easy Peasy Peasant Dress pattern for Girls 1 - 10 years or Easy Peasy Peasant Dress pattern for Baby 0 - 24 months
Elastic
You can use any peasant dress pattern for this tutorial, but I hope you don’t mind if we plug ours (linked above)- it has a darling a-line shape and includes flutter sleeve, short sleeve, angel sleeve, 3/4 sleeve and long sleeve options, plus the choice to finish the hem with a ruffle or a simple hemmed finish, all at a very low price.
We are using a man’s standard size Large dress shirt. We can make any size 0-3 months through girl’s 4/5 from this shirt. A larger or less fitted shirt should be able to make up to a 6/6X, it almost fit on ours but was just a bit too small.
Step 1: Wash and dry the shirt if it’s only been dry-cleaned. You want to be sure you can machine-wash your dress and not worry about shrinkage.
After washing and drying, make sure your shirt is big enough for the dress size you want to make. You can lay your half-pattern Dress Front pattern piece on the shirt front, aligning the fold line with the buttonholes to see if it will fit.
Then, cut up the shirt! The best thing about this upcycle is you don’t need the collar, cuffs, or underarms of the shirt, which are the parts of it that tend to get the most wear. Cut up the side seam, around the armhole and collar, and down the other side to disconnect the shirt front, which will be your dress front. Leave the shirt buttoned, you won’t need to unbutton it at all.
Cut around the remaining portion of the armscyes and down the sleeve seams to cut out the sleeves so they will lay flat. Also cut off the cuffs, you won’t need them. Then cut the shirt back from the yoke.
If you have a front pocket that is well-matched to the shirt front, you might like to just leave it in place, as it might leave stitching holes behind, and you do risk cutting the shirt unless you seam-rip very carefully. I risked removing the pocket, and with a good blast with a steam iron, the stitching holes were barely visible.
You’ll want your dress front pattern piece to be a complete piece rather than ‘cut on fold’ since the shirt won’t fold neatly along the buttonholes. You can either print 2 dress fronts, or trace your dress front onto a large piece of paper such as tissue paper or newspaper and tape them together along the fold line, which is now center front. Place this center front line right along the buttonholes of your shirt. Take care that the top button of the shirt is at least 1.5” from the top of the dress pattern since you’ll be folding a casing.
Cut the dress back from the shirt back (on the fold is just fine here!), and sleeves from the sleeves. You can see, even our long sleeve piece fit on the shirt sleeves! But I decided to make short sleeves out of preference.
Construct per the pattern up to folding the elastic casing for the neckline. Because the button placket on the shirt is pretty bulky, you might want to serge the edge to finish it, then turn under once to form the casing rather than turning it twice. If you turn it twice, see if you can get inside the button placket with your scissors and cut away some of the seam allowances and interfacing in there, and press well. Start sewing the casing at one side of the placket and sew around to the other side of the placket. Insert the elastic, join the elastic ends, and close the gap by joining stitches across the placket.
Press up the hem and you’re done! You can either baste the button placket closed and fold it under as one piece, or, to keep the cute ‘shirt’ look, fold and press them under separately, then hem from one edge to the other so they remain separate.
As an extra cute little touch, I scaled down the original shirt pocket by tracing around it about 3/4″ from the edge, cut away the excess, then re-pressed the facing and the edges and reattached it to the dress.
Enjoy your upcycle! You can check out our Easy Peasy Peasant dress pattern by clicking here.
Save
Save
Save
Save
Save
Save
- Get link
- X
- Other Apps


Comments