Hip to Be Square - Sewing Mitered Corners on Cloth Napkins or other Hemmed Squares

Suppose you have a square (or rectangle) to hem -  a set of cloth napkins, a tablecloth, or your Tie Dye Diva Fairytale Dress. Did you know you have some choices for hemming techniques? You could of course make a quick rolled hem with your serger, but even if you want a folded hem, you have a choice. You can fold an edge over twice, stitch it down, then proceed to the next edge and do the same thing. It works, and makes a perfectly fine folded hem in a minimum of time. But at the corners where the edges overlap, you’ll have a full 6 thicknesses of fabric, which does get a bit bulky.

Here is one of your other choices: mitered corners. They take a bit of time, and you risk burned fingers if you don't work carefully, but here's a method of creating them without too much fuss and some tips for saving those fingers in the process.


Materials:
  • Your Tie Dye Diva Fairytale Dress pattern or Pixie Belle Skirt pattern, or other right angles you need to hem. For cloth napkins, squares 16" x 16" work nicely.
  • Iron with steam setting
  • air-erasable marker
  • ruler
  • cardstock to use as pressing guide
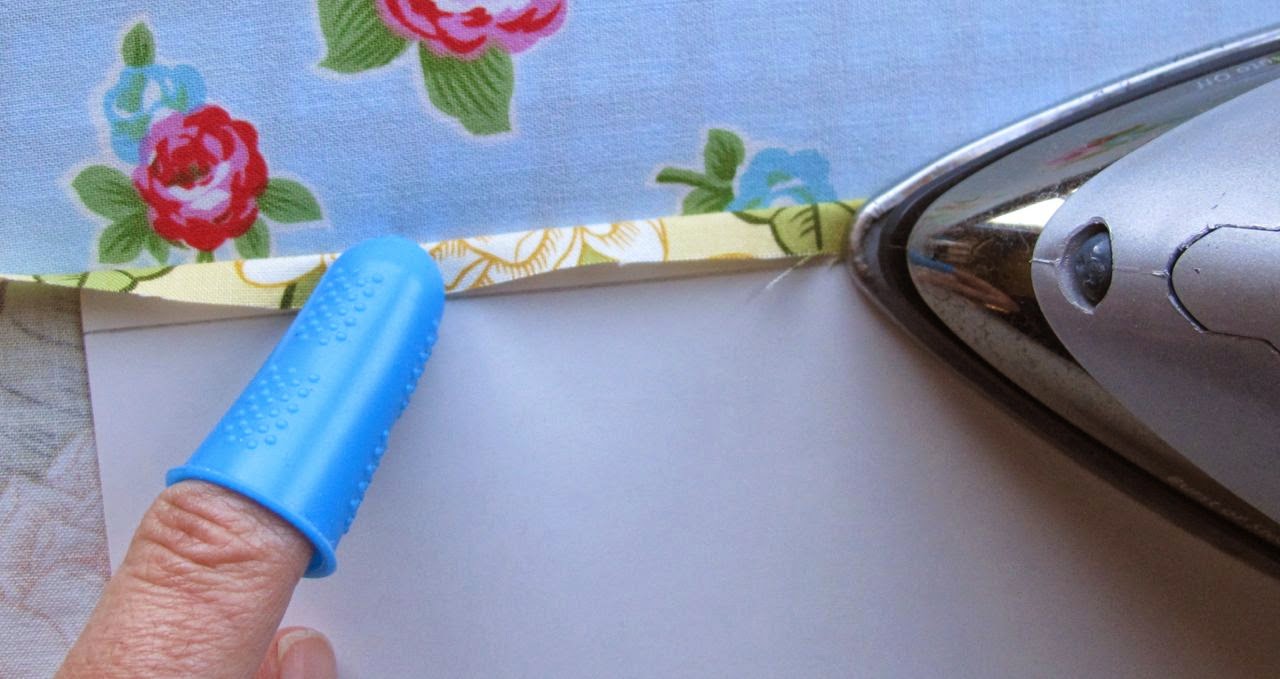
  • optional but recommended: silicone fingertip guards
The first step in saving your fingers is creating a simple pressing guide. Because I fold my fabric stash on 'comic boards', that is usually what I use. Any uncolored cardstock-weight paper will do. Don't use colored paper as it may transfer to your fabric as it gets damp with steam.

Use a pencil (not a pen, which might transfer to your fabric), mark the longest edge of the cardstock 1/4" from the edge. You can see mine under the pen and finger protectors in the photo. For this project, that's all you'll need! You might love using it so much that you want to make some additional marks at 1/2", 1", etc. for your other projects.

With your iron on steam setting, use the pressing guide to press 1/4" under on all sides of your square.


Then use that first fold as your guide to press all edges over again 1/4".


While the corners are double-folded, give them a good press with your steam iron to set the creases, then unfold (careful! Use the finger protectors or wait for it to cool.) You'll see a grid pattern at the corners that looks like this. Mark the inner and outer corners with your air-erasable pen. As you get more practiced at this, you may not need to make the marks, but it helps immensely as you are starting out.


Clip across the corner at the outer mark.

 
Then press the resulting angled edge over to (or just barely past) the inner mark. Press well.

 
Use the finger protectors or a tool like the eraser end of a pencil to help you turn the 1/4" folds back into place and press well. They ought to meet right in the middle as you see in the second photo below.


(Troubleshooting: if your side edges are too far apart and don't meet in the center, you have pressed your diagonal edge under too far. If they are so close that they overlap, you have not pressed it far enough.)

Stitch around near the folded edge, pivoting at the corner.


Enjoy your pretty mitered corners!

Tie Dye Diva Pixie Belle Skirt Pattern

Quick guide (great for pinning):


Comments

Unknown said…
This is hands down the best mitered corner tutorial I have ever seen! Thanks Jen!
Kathy said…
Yes I agree, with Once. Great tute. My fave part is silicone finger guards! Going to get some asap!!
Anonymous said…
I think I'd call that a mock mitered corner - a true miter would show a diagonal seam where the edges of the corner were stitched together. But your technique is quick, easy and effective.