

I'm really excited to bring you this free tutorial on the Tie Dye Diva stop of the Elle Inspired Twelve Days of Christmas blog hop! We use this Christmas card holder every year. I adapted it from an over the door holder I read about in a Martha Stewart magazine years ago. It's a nice way to display all your Christmas cards and holds up year after year.

Now, I happened to have snapped a pic of it hanging the year before last so you can get an idea of how it looks hanging up full of cards. Not the most artsy photo, especially with our baby gate there on the left, but you get the idea. This is why I am primarily a sewing pattern designer and not a blogger.
OK, on to what I do better than artsy photos, instructions. Here's how to make your own Christmas card display from ribbon and binder clips.

For a 36-card holder (6 ribbons) you'll need:
10 yards grosgrain ribbon
36 gold, silver, or colored mini (1/2") binder clips
Fray-Chek or other method of sealing ribbon (heat sealing is fine)
Chalk or other method of marking ribbon
hand needle and thread or sewing machine and a very alert brain
The width of the ribbon is up to you. I am using 1.5" wide, either narrower or wider would also work. It's important to use quality ribbon. I chose grosgrain because it doesn't wrinkle - remember, these will be in storage for 11 months out of the year. You can of course use plain black binder clips, but metallic or colored ones look really nice with Christmas ribbon and they are easy enough to come by at any office supplies store or online.
1. Cut 6 lengths of ribbon each 58" long. On one end, cut a V shape by folding the ribbon and making about a 1" cut at an angle toward the fold. Heat seal or fray-check this cut.


On the other end, fold the end under 1", then under 1" again. Stitch across the fold.


2. Mark the ribbon 4" from the folded and sewn end to indicate where the first clip will be sewn.

Then mark 9" from the first
mark.

3. Fold a clip into its 'pinching' position as shown, lined up with the first mark. It's important to be sure it's in the right position because if you sew the wrong side of the clip to the ribbon you'll have to undo it and you'll be super mad.

Once
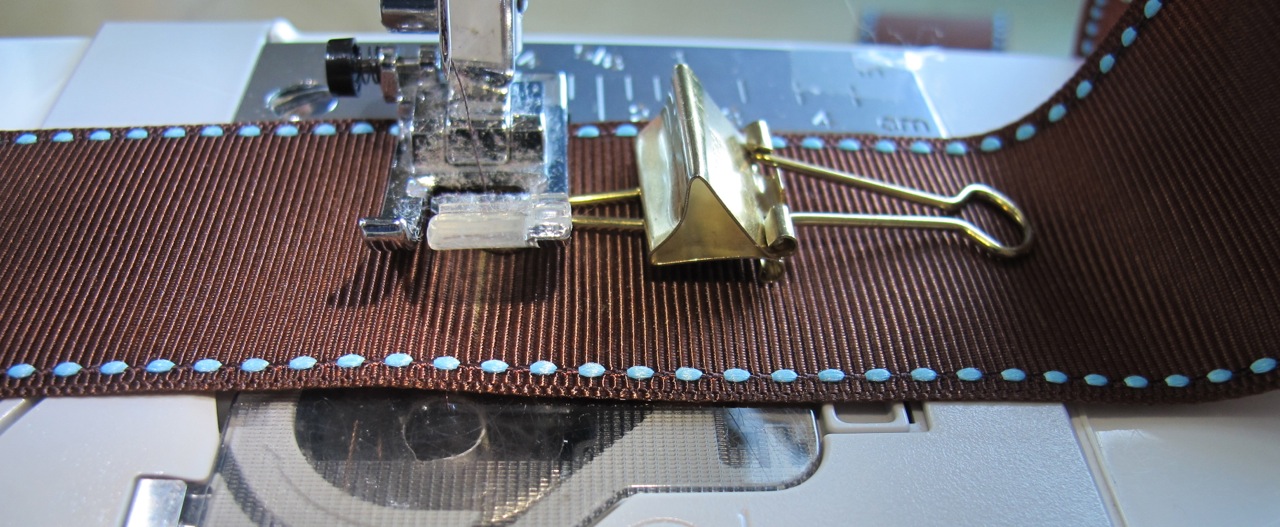
you are good and sure you have the correct side of the clip being sewn to the ribbon, you can fold the other end of the clip out of the way as shown below. If you're hand sewing, you don't need to do this.

Now, you can use a hand needle and thread to sew the clip in place. It's a nice peaceful activity.
You can also use your sewing machine to sew the clip in place, but it's a nerve wracking and potentially dangerous activity so BE CAREFUL. Set your machine to a medium-height (I use 3.5) and short length (I use 1.4) zigzag stitch and before you even think of stepping on that pedal, slowly rotate the hand wheel to make sure the needle will clear both sides of the clip. You do NOT want your sewing machine needle to hit that metal clip, it can be very bad for your machine and very unhealthy to have pieces of broken needle flying at you. Once you are sure the needle will clear, sew a few stitches over the clip, backstitching at the beginning and end.

Repeat for all the clips, dust off your chalk marks, hang the card holders and wait for all your friends to send you pretty cards.

Happy Holidays from Tie Dye Diva patterns! More crafty Christmas goodies including Santa Hat patterns, Plush Christmas Ornaments and great ideas for gift giving at www.tiedyedivapatterns.com. Save 25% when you buy 3 or more Tie Dye Diva patterns by using discount code BUNDLE at checkout.
Don't miss the rest of the stops on the Twelve Days of Christmas blog hop! Tomorrow, Little Lizard King!

Comments